Steps to Make a Menu
The easiest way to get started is to add a few foods and headings, and then drag them over to the menu. You can then flip through the Menu Styles to see how it works:
Here are the steps to get started:
- Select
View > Classic - Select
File > New Menu - Next to Food Items click the
Newbutton - Fill in Food Item fields for Name, Description and Price and then click
OK. You can repeat this step to a add a few Foods Items. - Next to Headings click the
Newbutton. - Enter the Heading text such as 'Appetizers', 'Starters', etc. then click
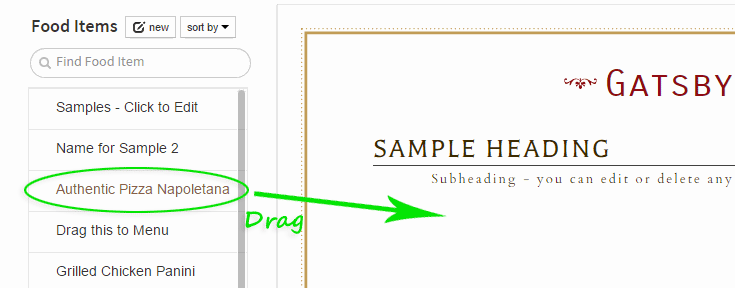
OK - Now click and hold the Heading you just created and Drag it over to the menu and Drop it. Next drag some Food Items to the menu in the same fashion - drop them under the Heading in the order of your choice.
- Once you have few items on the menu you can a) click and drag to change their order b) click to edit them c) hover and click the X to remove them (or click to edit and uncheck the
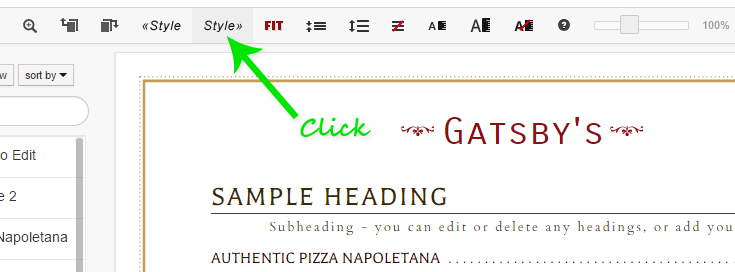
On Menubox, then clickOK). - Next, try clicking the Next Style» button on the toolbar to see what your menu looks like with different designs.
- Finally, at any point during the process, click on the toolbar (or use
File > Create PDF to Print) to create a PDF menu which you can print or upload to your website.
Switching Menu Styles
You can switch Menu Styles at any time using the Design > Switch Menu Styles command to choose a specific Menu Style.
Or you can click the «Previous Style or Next Style» buttons on the toolbar to cycle through the available styles.

