Blank Items
iMenuPro provides several ways to add spacing to a menu.
You can use Page Spacing for each page, Custom Before/After Spacing for each item (described above), and even Line Spacing (spacing within all of the items).
But if the above methods don't suit your needs, there's a spacing trick you can use — {blank} items.
Blank foods or headings can not only be used as spacers (you can adjust their Custom Before/After spacing) but they can also have accents, images, or other options attached.

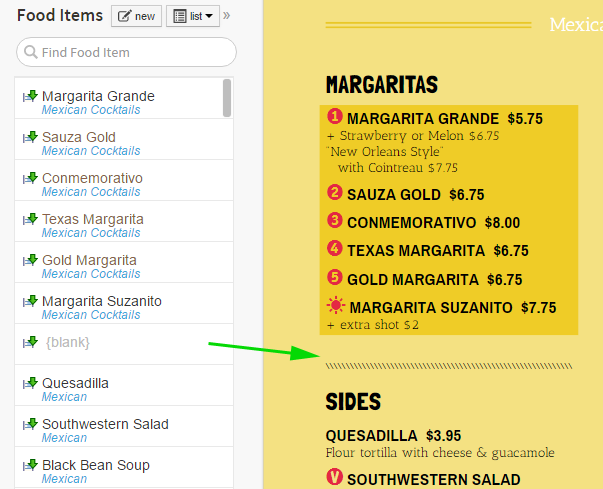
Example of a {blank} food with a divider accent and expanded Custom spacing

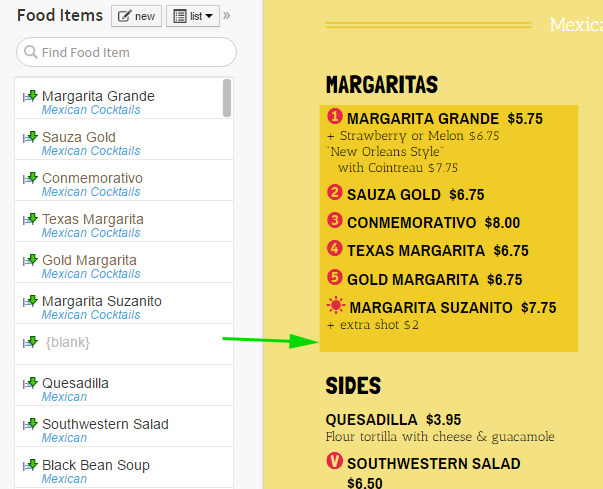
Example of a {blank} food with a solid box accent and reduced Custom spacing
To Create a {blank} Food Item
Click the New button next to the Food Item list. When the food item box appears (without entering any text) check the box that says Center and then click OK. A {blank} item will appear in the list.
You can also edit any food item on the menu or in the food list and remove all text from all fields, and then click OK.
Either method will create a {blank} item.
To Create a {blank} Heading
Click the New button next to the Heading list. When the heading box appears (without entering any text) select Accent (none) and then click OK. A {blank} heading will appear in the list.
You can also edit any heading on the menu or in the headings list and remove the text and click OK.
Either method will create a {blank} heading.
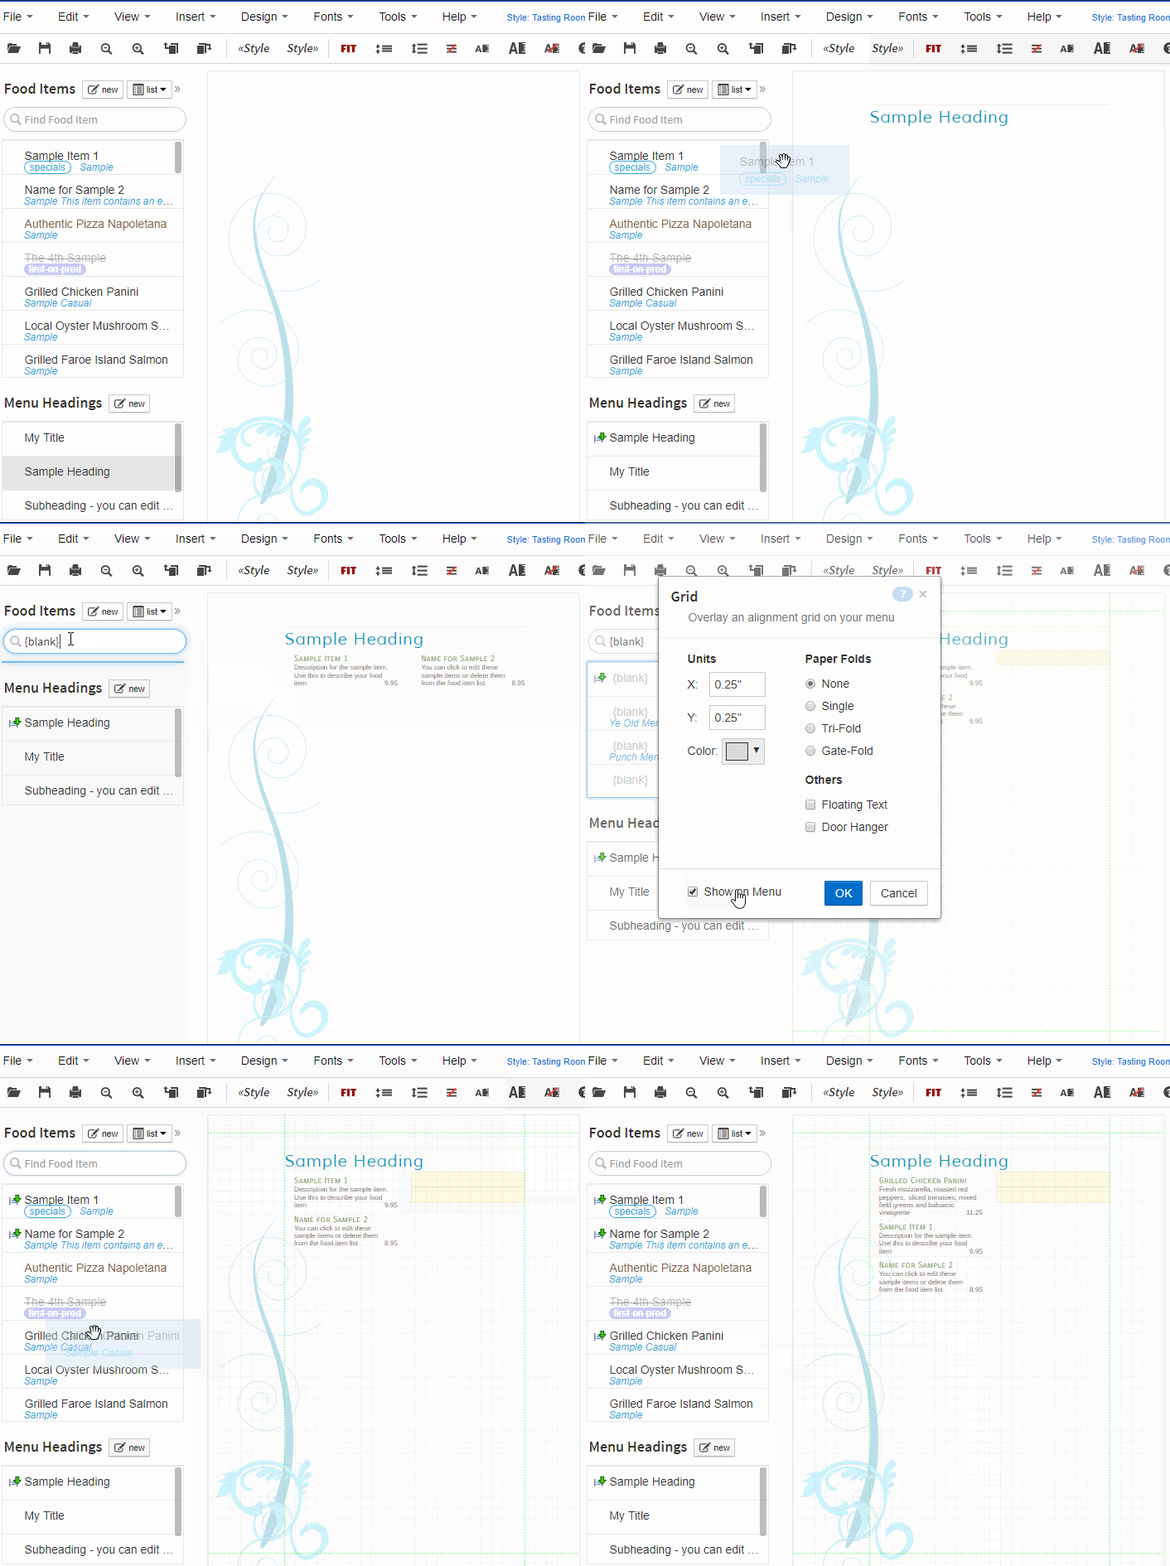
Tip! You can search for {blank} food items in the food list by entering a {blank} in the Find Food Item search box. Also, if you have the iMenuPro Grid on, {blank}'s show up as yellow boxes on your menus.
To Edit a {blank}
Simply click the item in the list or on the menu (if it's currently on the menu) and edit its options.
To Place a {blank} on the Menu
Drag the {blank} from the list and drop it on the menu. Or click the {blank} to edit and then check the On Menu box. Or right-click the {blank} and select Place on menu. The last two methods will place the {blank} as the last item on the menu.
To Move a {blank} item, or Reorder it on the Menu
Click and hold the {blank}, directly on the menu, and drag it to a new spot. Or right-click the {blank} and select Move Up or Move Down.
To Remove a {blank} item from the Menu
Click the {blank}, on the menu or in the list, and uncheck the On Menu box. Or (if you're on a computer with a mouse) right-click the {blank} and select Remove from menu or hover over the {blank} with your mouse and click the X in the upper-right corner.
To permanently Delete a {blank}
Click the {blank} in the list to edit, and then click the trash can icon or Delete. Important! If deleting a food {blank} make sure it does not appear on any other menu before deleting, else it will be removed from all other menus as well.
Tip! You can change the Custom Before/After spacing for any {blank}. And like all items, for Before you can enter a negative value (up to -0.20"). This extreme reduction in spacing can often come in handy for {blank}'s.
Using {blank} items with Food Columns
{blank} food items can sometimes be useful if you are using Food Columns but want more food items on one side than the other.
Since Food Columns automatically even out (auto-balance) the number of items in each column, you can use {blank}'s to fill a position and thereby have a column with more visible items than the other column.

Example using {blank}'s to reposition items under Food Columns.
