QR Ultra
"QR code (abbreviated from Quick Response code)."
Wikipedia
The point of QR is speed. The last thing you want is a belabored QR code menu conversion process from your printed menu, or worse, having your customers wait for slow downloads on their smart phones because of a sluggish backend implementation. And maybe worst of all – customers viewing stale menu content because they didn't refresh their browser page.
That's where QR Ultra comes in.
So “live” your customers won’t need to refresh
QR Ultra offers many advantages and enhancements over standard live-sync QR menus.
First and foremost is speed. Utilizing advancements from our live-sync technology, QR Ultra menus load faster worldwide, and content updates so fast that refreshing your browser page to see the newly updated content is not even required. Your menu updates literally appear – for every customer – even if they haven't refreshed their page.
Additionally, the new appearance themes for QR Ultra were specifically designed for mobile devices, meaning they load faster and have a higher readability index across the board. Plus you can get creative and fancy on the actual QR code itself, with multi-color designs, dot patterns, and even add your own logo inside the QR code. And we've added new options to turn your QR page into a virtual landing page for your business, enabling you to host several different menus at once using just one QR code.
Options to customize your QR Ultra menu page
The following options are available:
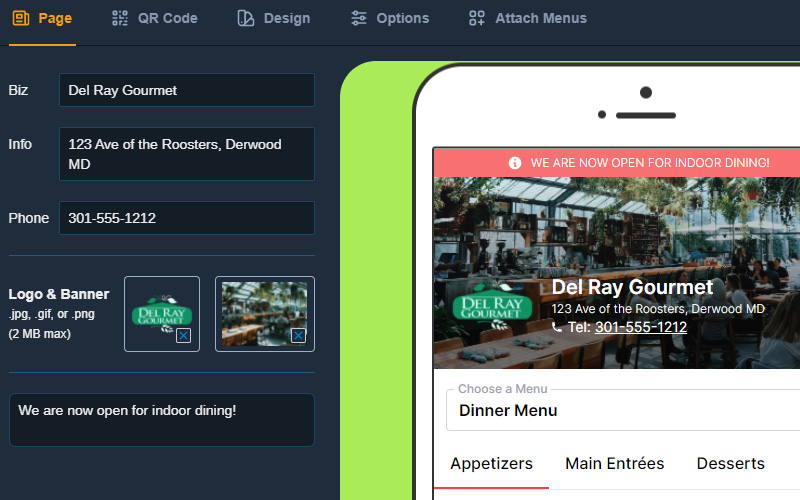
Page
Biz
The name of your business or page title appears at the top of your QR page.
Info
This appears in smaller text below your business name. You can use it for your address, email, phone number or any fine print that you want to display on your QR page.
Phone
Adds a clickable phone icon that lets your customers instantly call you from their smart phones to place an order or inquiry about something else.
Link (and link text)
Lets you add an outgoing link to the page (the link text will appear on the page and be clickable as a web link). You can use this to link to your website, to an ordering platform, or anything else.
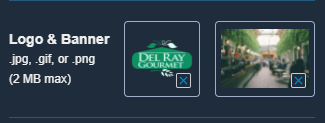
Logo & Banner
A business logo and banner image that will appear at the top of your QR page. You can use one or the other, or both.
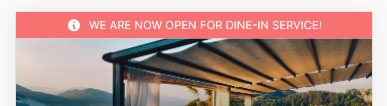
Welcome Message
This optional message appears at the very top of your QR page, and is great for notifying customers of recent changes to your business or notices of special events.
QR Code
Pattern
The shape of the inside QR pattern pieces, traditionally Square.
Frame (and frame label)
The type of frame design that can optionally surround your QR code. Some of the frames have pre-selected "call to action" text. You can change that here too with canned phrases like Scan Me or View Menu.
Border (color)
Use this to change the color of the border elements that surround your QR code.
Corner (color)
Use this to change the color of the corner squares within your QR code. Hint: keep this color relatively dark to prevent scanning errors.
Pattern (color)
Use this to change the color of your QR code's optical label (aka square grid or matrix). Hint: keep this color relatively dark to prevent scanning errors.
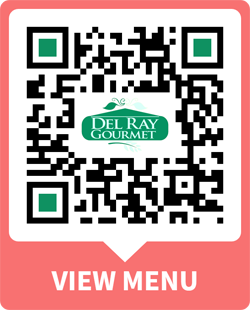
Inside QR logo
A logo that will appear in the center of your your QR code.
![]()
Download PNG
To download the QR code, click the Download PNG button. Once you have the PNG image of your code downloaded, you can use it in any image editing software and, of course, in iMenuPro. To upload it back into iMenuPro so it can used on a flyer or table tent, simply use the Insert > Uploaded Image command, and then add it to a menu as would any other image.
Print as PDF (4 or 16)
If you want instant QR codes without having to create a flyer or table-tent, just use the Print as PDF button to create either a 4-UP table tent or a page with 16 smaller QR codes (4 per row). Click the 4 or 16 next to the Print button to toggle the PDF printing options between 4 and 16.
Share your menu
Along with the QR code, you'll receive a Public Link that hosts your live menu page permanently, independent of your website. This is the link where your customers will "land" once they scan your QR code. You can share this link on social media and share it with customers directly, even if you don't have a website. You can also use it as your Google My Business menu link URL. The Public link does not require a website and, in most cases, should not be used in your website – use a Live-Sync menu Embed code, or QR Ultra Embed code for that.

Design
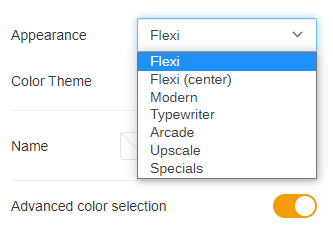
Appearance
A list of themes that come with preset fonts and colors.
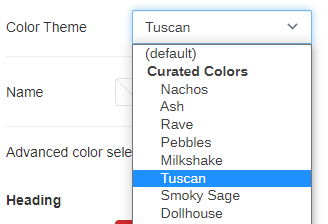
Color Theme
A list pre-selected palettes if you want to customize the Appearance colors. The special option Match Printed Menu will match the colors of your current iMenuPro menu.
Biz/Info
Use to customize your business information that appears at the top of the page.
Background
Use to customize the background color of your QR menu.
Alert
Use to customize the background color of the "Welcome Message / Alert" that appears at the top of your QR menu page.
Advanced color selection
Turn this toggle ON to customize colors of specific elements of your QR menu. Once on, options will appear that allow you to customize each type of heading and each element of your food items. If the toggle is OFF, you can still customize all headings and food items by using the general Heading or Food Item color selector.
Options
Navigation
Use this option if you have a long menu and want to give users the ability to navigate, rather than scroll to different sections of your QR menu. A navigation tab will automatically appear for each normal or alt-font menu heading.
There are several navigation design options that change the way the navigation bar and tabs appear, including the Horizontal Short-line pictured here.

Advanced Tip! You can exclude any heading from appearing in the navigation bar by adding some special html text to the heading. This text will not appear on your printed menu and will instruct QR Ultra to exclude the heading when it builds your navigation bar. In the example below the special imp-no-tab text that surrounds the heading "Our organic guarantee" will prevent it from being added to the navigation bar. 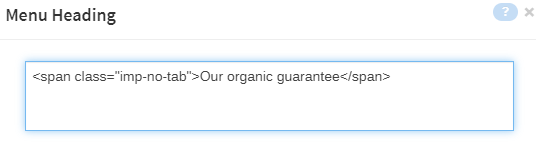
Similarly, you can use imp-yes-tab to include a heading on the navigation bar that would normally be excluded, such as a subheading or a Title heading.
Floating Text
Lets you decide where to put your floating text. Since there's no real concept of printed pages on the web - a web browser's viewport constantly changes size depending on the device (phone, tablet, desktop, etc.) - the floating text is positioned at the top or bottom of your QR menu, or hidden completely.
Publish Date
Use this option to include the date and time (on the QR menu page itself) when the menu was last synced.
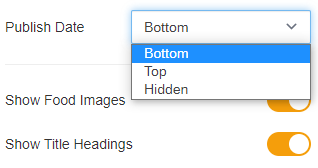
Show Food Images
If this option is disabled, all food images will not be shown.
Show Title Headings
If this option is disabled, all Title headings will not be shown.
Show Bin/Numbers
If this option is disabled, all food item Bin/Numbers will not be shown.
Show Prices
If this option is disabled, all food item prices will not be shown.
Show Notes
If this option is enabled, a customizable note link for all items that have a hashtagged note will be displayed. This can be used to display dietary or other information about your items.
Sync on Save
If this setting is checked, iMenuPro will automatically sync your QR Ultra menu to your printed menu whenever you save your menu (this excludes automatic menu saves by the app such as Auto-save, automatic save at logout, etc.). If you'd prefer to sync your QR Ultra menu only at specific times (useful if you're making lots of edits to your printed menu that you don't want reflected on your QR menu) then leave this setting unchecked.
Attached Menus
If your QR Ultra menu page has only a single menu, you won't need this section. But if you want to attach multiple menus to the same QR code you can use the features below to achieve that.
Attaching menus to your QR menu page allows it to act as a hub where customers can scan your QR code and then select and view various menus from a menu selector.
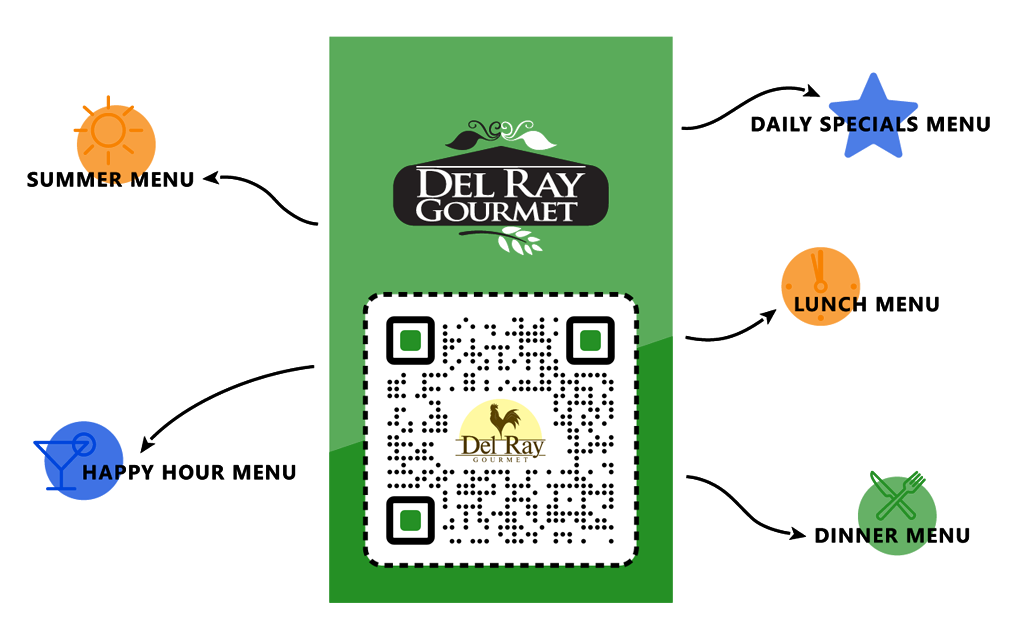
Primary Menu
This is the name that will appear in the Menu Selector for this QR menu. It will appear at the top of the selector list.
You only need to name your primary menu if you have additional menus attached to your QR Ultra page and you have the Menu Selector option set to on (the menu selector enables your customers to navigate directly to specific menus rather than having to scroll through the entire page).
Attached Menu lists
The top list contains menus that are added to the current menu page. The bottom contains a list of menus that have been synced using QR Ultra. You can click the + icon on any menu in the bottom list to move it to the top list, thereby attaching it to the current QR menu page. You can click the - to remove a menu from the top list.
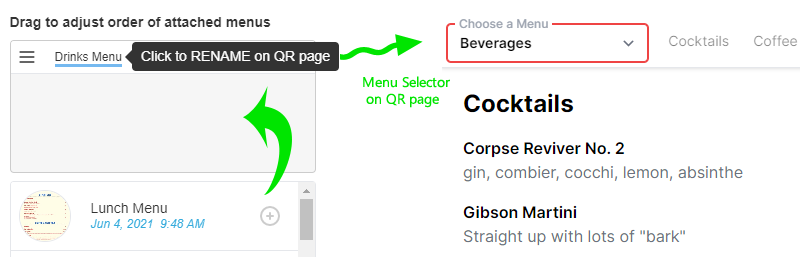
If you have more than one attached menu you can drag them in the list to change the order in which they will appear on your QR page. Click the ≡ symbol to drag them.
Make sure to name the attached menus so they have the name that you want your customer to see when they appear in the menu selector list. You can use whatever names you want for the primary menu or attached menus - they will not affect your iMenuPro filename.
Click on them, once you've added them to the top list, to rename them.

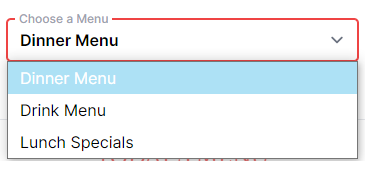
Menu Selector (on/off)
Determines whether a Menu Selector will appear on your QR menu page or not. Switching to on allows your customers to choose between your current (primary) menu and any menus that have been attached (see above).
Switching to off removes the menu selector from your QR menu page – the attached menus will still appear on the page however. Use this option if you want to attach menus, but don't need a selector.
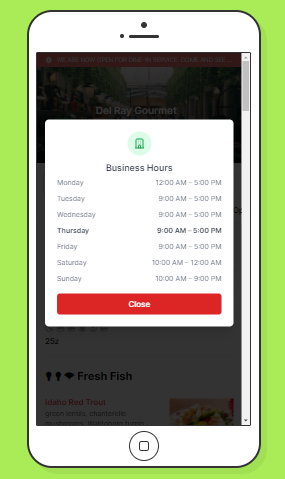
Hours
Business Hours
Here you can set the hours, for each day of the week, when you're open for business. You can use 12 hour notation or 24 hour military time.
You can set up to 2 time ranges per day, i.e. Lunch/Dinner operating hours. To add another time range for that day, click the + next to the corresponding day.
If you want to remove the additional time-range that you added, click the X next to the associated day.
Share
Public Link
Along with the QR code, you'll receive a Public Link that hosts your live menu page permanently, independent of your website. This is the link where your customers will "land" once they scan your QR code. You can share this link on social media and share it with customers directly, even if you don't have a website. You can also use it as your Google My Business menu link URL. The Public link does not require a website and, in most cases, should not be used in your website – use a Live-Sync menu Embed code, or QR Ultra Embed code for that.
Embed
HTML embed code
Copy this HTML code and insert it directly into your website to display your QR Ultra menu. This code can also be used on any website builder that supports inserting HTML code or snippets.
Example using Squarespace with QR Ultra Embed Code
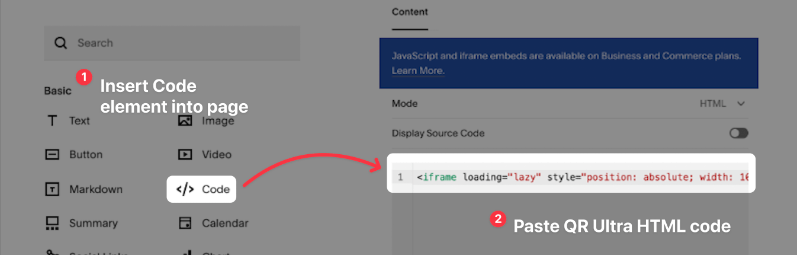
If you are having issues inserting the embed code properly into your website, refer to your specific web builder's instructions regarding HTML code insertion.
Smart URL embed link* Beta
If your web builder supports adding an embed URL, you can use this link to display your QR Ultra embed menu on your website.
Example using Squarespace** with QR Ultra Smart Embed Link
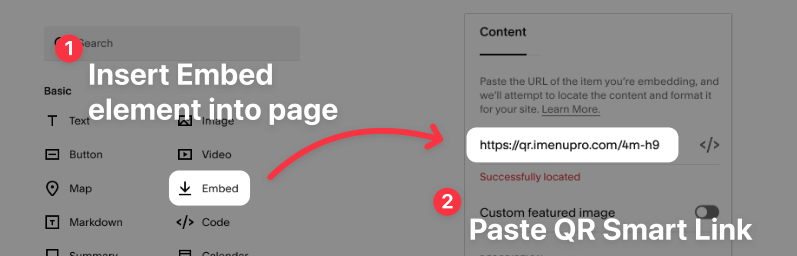
**If not supported for your application, use QR Ultra Embed Code instead.
If you are having issues using the Smart Embed Link with your web provider, refer to your specific web builder's instructions for oEmbed, or try the above HTML embed code, which is more widely supported.
READ BEFORE USE *Smart Embed Links use an open-source standard called, oEmbed. This feature is currently in Beta and may not be supported by your website provider.
For more information, refer to the instructions provided by the your web builder on adding embeds, or consider using the HTML embed code instead (see instructions above).
Transparent Background
Enabling this option will make your QR Ultra menu background transparent, so you can blend the menu in with the background of your website. This option applies to QR Ultra Embed menus only.
Menu published
Turning this option off, replaces the currently synced QR Ultra menu content with a menu that says Not published yet. You can also add an optional message such as "We'll be back after the holiday" or whatever you want to say to your customers who access your QR menu page while its unpublished.
This is useful if your daily menu 'expires' and you don't want stale content on your site. Simply unpublish the menu, and then re-sync when your new content is ready. Note: Unpublish does not change your QR code or public link. So you won't have to reprint your QR code flyers when you unpublish.
Sync Now
This button syncs your QR Ultra menu to your current printed menu, i.e, your QR menu is updated with the current contents of your printed menu, even if you haven't saved your menu yet.
If you have auto sync enabled, you won't need to click this button. Otherwise, whenever you're ready to sync new changes to your QR Ultra menu, just click this button.